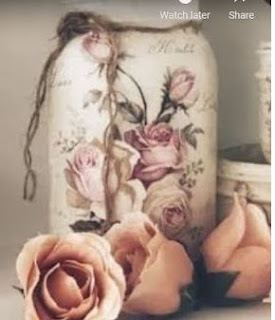
Creative Techniques for Decoupaging Mason Jars with Printed Napkins and Plastic Bags
Mason jars have become incredibly popular for various crafts and DIY projects due to their versatility and timeless charm. One exciting way to transform these plain glass jars into beautiful decorative pieces is through the art of decoupage. Decoupaging involves adhering paper cut-outs to surfaces and sealing them to create stunning designs. In this blog post, we'll explore some creative techniques for decoupaging mason jars using printed napkins and plastic bags, allowing you to unleash your artistic side and add a touch of elegance to your home decor.
Gather Your Materials:
To get started with decoupaging mason jars, you'll need the following materials:
Mason jars
Printed napkins with designs of your choice
Plastic bags (transparent or colored)
Mod Podge or decoupage glue
Small paintbrushes
Scissors
Sealant (such as clear acrylic spray or varnish)
Optional: decorative elements like ribbons, beads, or twine for embellishment
Preparing the Mason Jars:
Clean the mason jars thoroughly to ensure there is no dust or residue on the surface. Dry them completely before beginning the decoupage process. You may also consider applying a coat of paint to the jars beforehand to provide a colored base for your design.
Choosing and Preparing the Napkins:
Select printed napkins that complement your desired theme or aesthetic. Carefully separate the printed layer from the napkin, discarding any extra layers. Cut out the desired motifs or patterns from the napkin, ensuring that they fit well on the jar's surface.
Applying the Napkin:
Using a small paintbrush, apply a thin layer of Mod Podge or decoupage glue to the area of the jar where you want to place the napkin. Gently lay the napkin cut-out on the glue, smoothing it down carefully to remove any air bubbles or wrinkles. Repeat this process for each motif you wish to add, allowing each layer to dry before applying the next one.
Incorporating Plastic Bags:
For an intriguing twist, incorporate plastic bags into your decoupage design. Cut out sections of the plastic bags, considering different colors and textures to add visual interest. Apply a layer of glue or Mod Podge to the desired area on the jar and carefully place the plastic bag cut-outs on top. Smooth out any wrinkles and let it dry.
Sealing the Design:
Once you've completed the decoupage process, apply a generous coat of Mod Podge or decoupage glue over the entire surface of the jar. This step not only seals the design but also provides a protective layer. Allow the sealant to dry completely.
Optional Embellishments:
To further enhance the beauty of your decoupaged mason jars, consider adding some optional embellishments. Wrap a ribbon around the rim or neck of the jar, tie it in a bow, or secure it with a dab of glue. You could also attach beads, buttons, or twine to create a more personalized touch.
Finishing Touches:
To ensure the longevity of your decoupage design, seal it with a clear acrylic spray or varnish. This protective layer will safeguard the surface against moisture and make it easier to clean. Follow the instructions provided by the sealant manufacturer for the best results.
Decoupaging mason jars with printed napkins and plastic bags is a delightful way to express your creativity and add a touch of elegance to your home decor. By following these techniques, you can transform simple glass jars into unique and eye-catching pieces that are sure to impress. Experiment with different designs, colors, and textures.
Thanks for watching - have a great day!


Comments
Post a Comment